How to create and deploy Azure Functions using VS Code
This post describes how to create an Azure Function in Python using VS Code. Below are steps to create an Azure function from scratch using VS Code.
Step 1: Create folder for project.
mkdir azure-functions-project
Step 2: Open VS code and navigate to Extensions.
Step 3: In Extensions, search for azure functions.
Step 4: Select install to install the extension for VS Code.
Step 5: After installation, select the Azure icon.
Step 6: Click on Sign in to Azure. It launches a browser window, use Azure credentials to Sign in.
Step 7: Click on create Project and select folder created in Step 1.
Step 8: Choose following options:
- Select a language: Python
- Select a Python interpreter to create a virtual environment: Select the default available
- Select a template for your project's first function: HTTP Trigger
- Provide a function name: Enter any function name
- Authorization Level: Anonymous (Anonymous for the demo purpose, choose proper authorization as per your requirement)
- Select how you would like to open your project: Open in current window


Step 9: Click on Azure icon
Step 10: Click on Deploy to function app and select Create new function App in Azure.
Step 11: Enter a globally unique name for the function app and press "Enter".
Step 12: Select "Python 3.9" as runtime stack.
Step 13: Select any location for new resources e.g "East US", "East US2".
Step 14: Deployment takes couple of minutes, once deployment is complete login to Azure Portal .
Step 15: Search for Function App and select the newly created function app.
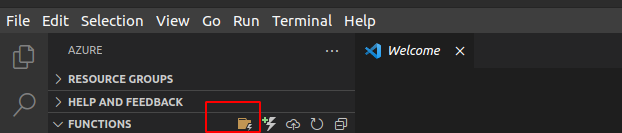
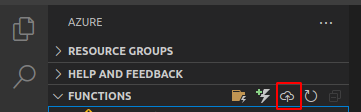
Step 16: From the Function App blade, select Functions and click on recently created function.
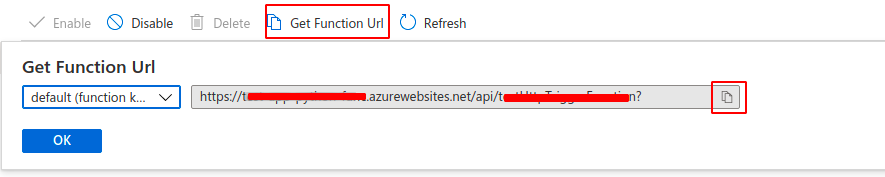
Step 17: Click on Get Function Url and copy the url.
Step 18: Open the url in browser you should se below output.

Category: Azure